Choosing Lenses for Video
Choosing lenses for video can be a difficult task. If you haven’t shot much before (either photos, or video) you will likely have problems identifying the appropriate focal lengths and maximum apertures, let alone actual lenses. The best way to get over this phase is to shoot some – preferably with a zoom lens to get acquainted with various focal lengths and what they have to offer. This article doesn’t touch the subject of focal length selection, which is largely a creative decision. Instead, it offers some considerations related to the use of still photo lenses for video work. It is centered on HDDSLRs and large sensor video cameras with photo mounts.
Usability requirements for lenses for video
Any lens can be used to shoot video, as long as you can mount it on the camera. That said, there are a couple of features, which make the job easier.
F-stops are defined as the ratio of the lens focal length to the physical diameter of the aperture. F-stops are not appropriate for precise exposure control because the f-stop is a geometric property and doesn’t describe actual light transmission. All lenses lose light due to reflections from the lens’s elements and internal light scatter. The trouble is, different lenses lose different amounts of light. That’s why cine lenses use t-stops instead of f-stops. T-stops mark aperture positions with light transmission equal to 100% transmission at the respective f-stop. So equal t-stops on different lenses mean equal transmission, and thus the same exposure (assuming both lenses have calibrated t-stop markings). Because real lenses are not ideal, the f-stop at a specific t-stop is always a smaller number for any lens. In general, lenses with more glass elements (like zoom lenses) exhibit larger deviations between t-stops and f-stops.
Smooth aperture is the most underestimated lens feature by new videographers. Image consistency generally needs fixed sensitivity of the capturing medium (fixed ISO) and fixed shutter speed. This leaves aperture as the only mean for precise exposure control. And precise control you will need, once you have to (near) perfectly match the exposure of a couple of lenses between shots in a sequence. Well calibrated t-stop markings allow for perfect exposure matching. In fact, t-stops are critical when shooting film. With digital one can get a perfect exposure match even without t-stop markings, as long as there is smooth aperture control available. This is achieved with through-the-lens exposure tools like a waveform monitor or a spotmeter and a solid tonal reference (usually a grey card). Exposure matching during the shoot is not mandatory, but saves matching time in post.
Next is the tight and smooth focus ring. A good focusing ring has decent travel for focus precision; has no play; ideally, has a hard stop at infinity; either allows for a focus gear to be attached, or is standard pitch geared itself for use with a follow focus.
Lens image rendition in relation to video
Lens resolution is largely overrated for low-end video. Sensor line skipping (used for video in most photo cameras) is brutal in decimating image definition and introducing fake detail from aliasing. Pixel binning is much more forgiving, essentially being localized downsampling. Image quality is then further degraded by video compression. Any decent lens will do fine in terms of sharpness for DSLR video. On the other hand, lens resolution matters a lot when high quality 4K video is concerned, or when recording RAW video from a small sensor (as with Blackmagic’s camera).
Lens contrast needs more attention. First, higher contrast images will appear to have more detail. Second, higher contrast images will endure somewhat better through heavy video compression due to their better value differentiation. Low contrast lenses, on the other hand, can slightly boost the captured scene contrast. Lens contrast is related to coatings: low contrast lenses are usually uncoated or single-coated, so they will also flare more.
Color rendition varies a lot. Older lenses often render warmer (due to benefits for black and white film). It is best to have neutral color rendition, but lens color can be modified through white balance camera options, or in post.
Out-of-focus rendering (bokeh) is largely unaffected by video specifics as its appearance is defined over (relatively) large areas of the image. So it is valid to take it into consideration when choosing lenses for video. Same with lens distortion and vignetting. Using full frame lenses on crop bodies pretty much eliminates vignetting problems though. Also, some cameras will correct these defects for native lenses. Abundant chromatic aberrations will be visible in video.
Video lenses vs. still lenses
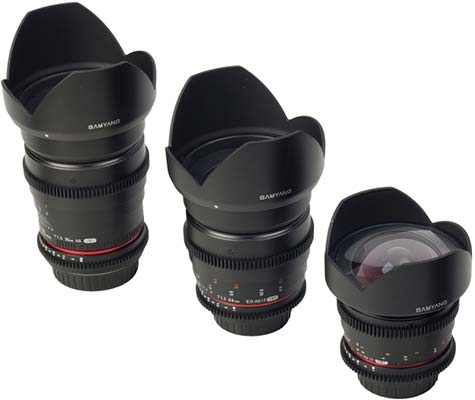
Unsurprisingly, video/cine lenses are better suited for shooting video than photo lenses. As a minimum, video lenses have smooth aperture control and good focus rings with standard pitch teeth for use with a follow focus. They usually feature t-stop markings instead of f-stop markings on the aperture ring. The distance scale is often to the side to make it visible to a focus puller, detailed, and precisely calibrated. Same with depth of field scales, where available. Photo lenses will mostly have the distance scale on top, so that the photographer can have a quick glance at it at will. High quality video lens sets like the Carl Zeiss compact primes are also color matched and feature matching front diameters (for use with matte boxes). Overall, image characteristics are matched across the set, including generally matching out-of-focus rendering due to the consistent number of aperture blades.
Video and cine lenses have a flaw though: they are usually quite expensive. Only recently Korean and Chinese lens manufacturers are getting into the market, with Samyang (also rebranded as Rokinon or Bower in the USA) and SLRMagic rehousing their photo lenses for video use and keeping the prices down. But in general, still photo lenses, especially some legacy 35mm lenses, are significantly cheaper.
Native mount lenses vs. adapted lenses
If you are using a photo camera for video (HDDSLR or a video capable mirrorless), you are likely invested in native glass already. Modern photo lenses, except for some third party lenses, are universally autofocus and usually feature electronic aperture control. Autofocus is still largely irrelevant for video, so the lenses are mostly used in manual focus mode. Autofocus lenses have a couple of side effects though. They usually have relatively short focus throw (for faster AF), which may limit manual focus precision. And their focus ring rotation don’t stop at infinity when in manual focus mode, but rather goes beyond infinity. That’s because the autofocus system usually needs to go beyond the exact focus point and then back a little when hunting for focus in order to get the sharpest result.
Electronic aperture control can be either a positive or a negative. On some cameras (Nikon D4 or Canon C300, for example) aperture can be adjusted in 1/8 stop steps, allowing some quite precise exposure control. Typically though, on photo cameras the aperture is controlled in 1/3 stop steps. This is still better than most manual focus and manual aperture legacy lenses which allow aperture control in either half stops or full stops. But manual aperture can usually be declicked, resulting in smooth aperture rings. Declicked aperture means both precise exposure control (with the help of through-the-lens exposure tools) and the possibility for basic aperture pulls during shots. The latter can’t be done with stepped electronic aperture.
Using lenses recognized by the camera body (this generally means lenses from the camera manufacturer) has additional benefits. In-camera processing can fix some optical defects. For example, Canon DSLR cameras have an option for peripheral illumination correction (vignetting correction) available for Canon lenses. Some cameras (Panasonic, Samsung, etc) will also optionally fix distortion on lenses they recognize.
Then there is image stabilization. This feature of some native mount lenses is very beneficial for handheld video, more so with long focal lengths. If handheld is your thing, it is probably wise to stick with native lenses with IS.
So what do legacy manual focus lenses have to offer?
Quality old manual lenses usually have tight and smooth focusing rings, which are vastly superior to AF lenses. The focus throw is often noticeably longer than AF lenses. As mentioned above, manual aperture rings (where available) can usually be declicked for smooth aperture control. Legacy lenses sometimes have “character” (which is glorified optical defects). Lenses from the 60′s and earlier will generally be uncoated or single-coated and will flare easily. This can be used for lowering contrast or for artistic effects. Legacy lenses often have sturdy metal bodies, unlike the plastic bodies common with modern lenses.
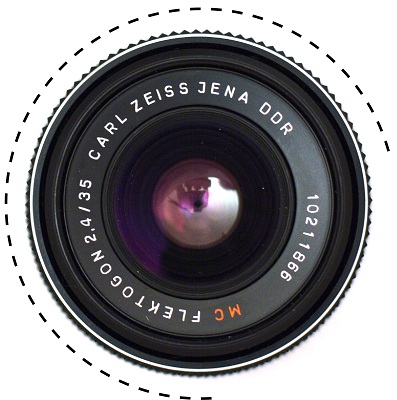
But the main attraction is price. With patient shopping, you can often collect a whole set for the price of a quality modern lens. That is, if you don’t jump on the Leica train. Relatively cheap manual lens systems include Super Takumar (M42), Olympus OM, Canon FD, Carl Zeiss Jena (M42), Pentacon (M42), Pentax K, Yashica ML (Contax/Yashica mount), Minolta MD, to name a few. Going up in price, there are manual Nikon F, Contax Carl Zeiss and Leica R.
Adapting lenses

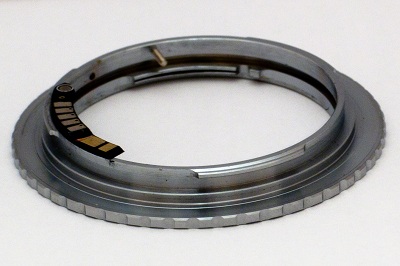
Olympus OM to Canon EF adaptor. FFD of the OM system is 46mm and FFD of Canon EF is 44mm, so OM lenses can be adapted to Canon EOS cameras.
The main factor that decides if a lens can be adapted to a camera mount is flange focal distance (FFD). This is the distance from the camera mount to the sensor plane. In general, lenses from a system with longer flange focal distance can be adapted to a system with shorter flange focal distance. A lens with a shorter FFD will need an adaptor with optical elements in order to be able to focus to infinity (if possible at all) on systems with longer FFDs. It is best to not bother with these. The common way to adapt is through a separate adaptor between the lens and the camera mount. But when the difference in FFD between the two systems is small, lenses can often be adapted through replacement lens mounts that take the place of the original lens mount. The replacement mount is manufactured to more or less equalize the FFD. Popular replacement mount routes are Canon FD to Canon EF, M42 to Nikon F, Contax/Yashica to Sony Alpha, Leica R to Nikon F, to name a few. The following table lists the flange focal distance of some popular camera mounts for reference.
| Camera mount | FFD in mm |
|---|---|
| Sony E | 18 |
| Canon EF-M | 18 |
| Micro 4/3 | 19.25 |
| Leica M | 27.8 |
| Leica M39 | 28.8 |
| Canon FD | 42 |
| Minolta MD | 43.5 |
| Canon EF | 44 |
| Sony Alpha | 44.6 |
| M42 | 45.46 |
| Pentax K | 45.46 |
| Contax/Yashica | 45.5 |
| Olympus OM | 46 |
| Nikon F | 46.5 |
| Leica R | 47 |
| Arri PL | 52 |
| Mamiya 645 | 63.3 |
Mirrorless mounts are the easiest to adapt lenses to. You can put pretty much any lens ever made on a Sony E-mount camera. Among (video) DSLRs Canon EF cameras are the easiest to adapt to, and Nikon the hardest. Due to mount specifics Sony Alpha cameras often require replacement mounts to be installed on the lens even though the FFD is only 0.6mm longer than Canon’s.
FFD is only one part of the equation though. Some lenses simply can’t fit physically on a camera even if they have a longer flange focal distance: they could be too wide, or they could hit the mirror (in the case of a SLR camera). For example, Arri PL lenses have wide mounts and protrude deep. Adapting can be a tricky business. For example, some Leica R lenses work on APS-C Canon DSLR cameras, but hit the mirror on full frame Canon DSLRs. So before investing in a lens make sure it can be used on your camera. Another issue is adaptor thickness. In order to ensure infinity focus adaptor manufacturers routinely make adaptors a hair too thin. This results in unreliable distance scales and annoying loss of the hard stop of the focus ring at infinity (where such a hard stop was previously available). Depending on adaptor construction, adaptors can sometimes be shimmed to the precise thickness through trial and error.
Prime lenses vs. zoom lenses
Primes’ most important advantage over zooms is faster maximum apertures. This means better low light capabilities and the option of shallower depth of field. Their generally better sharpness only matters when good quality video compression and/or high resolution are available. Think dedicated video sensors, RAW video or 4K. Primes are usually smaller and with less glass elements. This translates to lighter rigs.
Zooms, on the other hand, are all about flexibility and convenience. A single lens covers a whole range of focal lengths. This means less lens changes and lugging fewer lenses around. There is also the added bonus of color matched focal lengths over the zoom range. With parfocal constant aperture zoom lenses you can also zoom during a shot. So make sure your zoom lens is parfocal and not varifocal, if you plan to do this. Note that constant aperture is not always constant. There are often variations in true aperture over the zoom range. This may lead to slight exposure changes during zooms. Push-pull zoom lenses will need readjustment of the follow focus (if you use one) as the focus ring moves forward or backward with zooming. Modern zooms are mostly of the two-touch type, with separate zoom and focus rings. Photo zoom lenses (unlike cine zoom lenses) often extend a lot when zooming, which may either prevent their use with a matte box, or at least require matte box readjustment after changing the focal length. Then again, one can do fine without a matte box, especially when lens changes are rare. Photo zooms rarely have apertures wider than f2.8. If you need low light, you are better suited with primes.
Some thoughts on lens set building
If you’ve never shot seriously before, it is probably best to start with a standard zoom. Get familiar with the focal lengths, find out what you like and proceed from there. You can shoot a feature with a zoom lens. You can shoot a feature with a single prime. Buying a lens only because someone raves about it on the Internet is a bad idea. Get only what you need, when you need it. Build up gradually. It is usually best to build a set of lenses from the same system – only Nikon lenses, or only Canon lenses, or only Leica R lenses, etc. Some lens systems are better matched than others, but it is best to aim for serial numbers close to one another. Mixing lenses is the easiest way to get in trouble with matching color, contrast, or just “feel” between shots. But you should not absolutize this. Content is more important than the occasional mismatch, and sometimes the mismatch can even be used to an advantage. And sampling various lens systems will also give you a taste of what is out there. There is more on lens color in the article on color matching lenses for video. Matching the filter thread diameter of the lenses will let you work without step-up rings, both with and without a matte box. Luckily, lens manufacturers often utilize only one or two filter sizes within a single lens system.
Random tidbits
- Nikkors’ focus rings rotate in the opposite direction compared to pretty much any other lens.
- You may want to consider the minimum focus distance when choosing a lens. A lens with short MFD can give you near-macro shots without the need for a dedicated macro lens.
- Some very small lenses have the focus ring so close to the camera body that using a follow focus is hard or impossible.
- Some lens repair shops do cine mods to still lenses. These usually include installing focus gears, common fronts, and declicking the aperture.
- flickr is your best friend when you need to research how a lens renders.


very good information. great i found my way here.
i really liked your series about composition.