Creating Depth, Part 2: Perspective
The second part of the Creating Depth series is about perspective. While people usually think linear perspective when they read perspective, I will also put tonal and color perspective here. All these are concerned with perceptual properties changing with distance from the viewer, and they happen to provide major depth cues in an image. This article also explores the relationship between lenses and space representation.
Linear perspective

One-point linear perspective: Parallel lines converging towards a single vanishing point on the horizon.
Linear perspective (also referred as diminishing perspective) is both a mathematical theory of projecting 3D spaces on a 2D plane and a related technique of depicting space in a drawing. Incidentally, this is exactly what our photo image plane does with the photographed space.
But here we are interested in perspective in the context of perception. That is, the way objects appear to the eye depending on their distance. All perspective cues exploited by the brain follow from the simple fact that objects appear smaller with increased distance from the eye. When the absolute size of an object is familiar, its distance can be judged depending on the size of its projection on the eye’s retina. When the absolute size of an object is unknown, but there are at least two objects of the same kind in view, the relative size of the objects suggests a notion for their relative distance. The property of parallel lines to converge towards the horizon is also a good depth cue.
Lenses and perspective
Any rectilinear lens creates a (linearly) perspective image of the scene (a fisheye lens renders curvilinear perspective). A common misconception has it that wide lenses strengthen perspective and long lenses weaken perspective. This is not true. Perspective is entirely dependent on viewpoint. Relative positions and relative sizes of objects only change if the eye moves. It is not the angle of view of the lens that manipulates perspective, rather the shift of camera viewpoint forward with a wide lens, and backward with a long lens, in order to frame a subject in a similar way. This change of camera viewpoint creates the perspective differences often wrongly associated with the angle of view of the lens.
With the same size of a reference object in the frame, the wide lens exaggerates foreground-background relations and space appears expanded. Conversely, the long lens seemingly compresses and flattens space. Consequently, one good general rule for consistent space representation is to avoid mixing focal lengths when preserving the size of an important object in the frame. So this rule does not apply when changing from a wide shot to a close-up, etc, because objects change their sizes in the frame. The Vertigo effect (also known as a dolly zoom shot) demonstrates what happens when the change of focal length while preserving subject size is realized in a single continuous shot – space seemingly expands (pushing the camera in while zooming the lens out) or contracts (pulling the camera out while zooming the lens in).
The Vertigo shot is used here as a transition effect to a flashback. The viewpoint pulls back while the focal length increases: space contracts and the room appears to shrink.
In this context, lens choice is an instrument for perspective control. A normal lens presents a certain naturalism in space rendering. This is the focal length of choice when the camera must disappear. What exactly is a “normal lens” is worth an article of its own, what with all the misconceptions surrounding the term, especially in the moving pictures realm. Quick definitions for the purposes of this article: a “normal” image has its center of perspective at the viewer’s eye; wide-angle images have their center of perspective in front of the viewer; telephoto images have their center of perspective behind the viewer. Any non-coincidence of the viewing position and the center of perspective in the image creates a perceived perspective distortion, which can be used for artistic purposes.
Wide-angle lenses can render a stylized dramatic space and exaggerate movement on the depth axis; the intimate viewpoint adds a feeling of immediacy. Films by Stanley Kubrick, Terry Gilliam, Jean-Pierre Jeunet and Barry Sonnenfeld often exploit these characteristics. Telephoto lenses can emphasize the graphic qualities of the image and promote the abstraction of a plane from the space; the viewpoint is detached and formal (or voyeuristic, depending on context). Kurosawa (who was very particular about these things) used mostly long lenses together with multi-camera setups during the second half of his career.

Tinker Tailor Soldier Spy used long lenses and distant viewpoints extensively on exteriors to build a feeling of spying on the action.
Forced perspective
Forced perspective is a technique that exploits the principles of familiar size and relative size, and plays with the expectations of the brain to create an illusion. Depending on context, objects are made to appear either closer or further away than they are, or smaller or larger than their actual size. In the first case, cheating the size of the object manipulates its perceived position. In the second, cheating the position of the object manipulates its perceived size. Size manipulation was perfected in the Lord of the Rings trilogy. Tweaking actors’ positions and moving set elements around in sync with the camera allowed keeping the illusion even on moving shots.

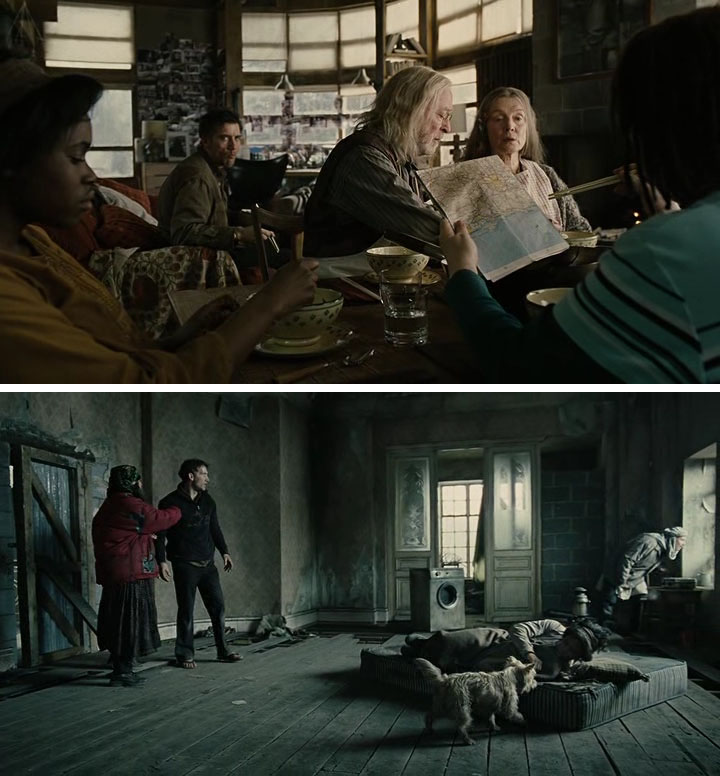
Small props and small people in the background fake a longer train and a deeper scene. Hitchcock shot this on a stage.
But the topic of this article is more concerned with faking distances. In its most popular form the technique uses objects smaller than their real life size to increase the perceived distance. This is most often done to effectively increase the perceived depth of the entire set. Filmmakers adopted this practical approach of faking depth very early. It was already an art in the days of the German expressionists. Using mattes to fake distant backgrounds is nothing more than a special (but simple) case of forced perspective. These used to be painted panes strategically placed on the set. Nowadays this is done mostly in post with greenscreens and CGI.
Aerial perspective and color perspective

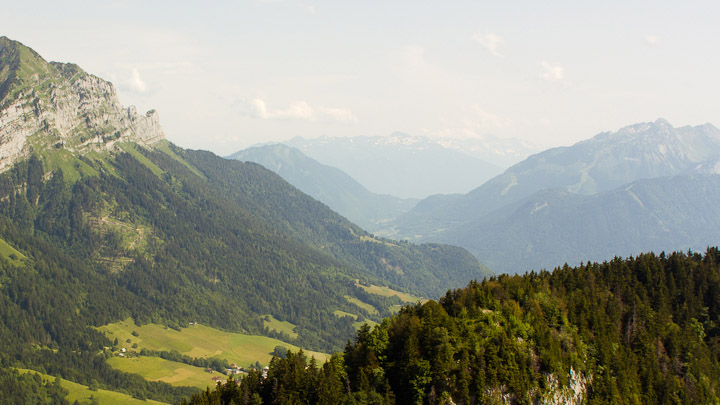
Aerial perspective is usually demonstrated through mountain vistas or cityscapes. I am staying true to tradition.
Aerial perspective describes the effect of atmosphere on scene appearance. It is often called atmospheric perspective or tonal perspective, the latter term widely used in the context of visual arts. The scattering of skylight from various air particles creates a veil of sorts over the scene. Effectively, some amount of scattered skylight is added to the reflected scene light. The longer the distance from the viewer to the object, the stronger the effect. As a result, distant depth planes have lower contrast, lower saturation and higher brightness than closer planes, and their tones appear to converge towards the luminance (and color) of the distant sky. Aerial perspective is another reason for the presence of texture gradient in large-scale scenes. The eye needs contrast to differentiate detail, so there is a gradual loss of fine detail perception with increasing distance. And since reflected scene light is also scattered by the atmosphere, object definition itself is affected in the first place: atmosphere acts as diffusion.
The accumulation of scattered skylight also creates a color shift. Since short wavelength light scatters more, there is more green and especially blue in the scattered daylight. That’s why distant objects seem to acquire a blue cast. Consequently, the conditioned brain readily agrees that warm tones in an image tend to advance, and cold tones tend to recede. This is sometimes called color perspective.

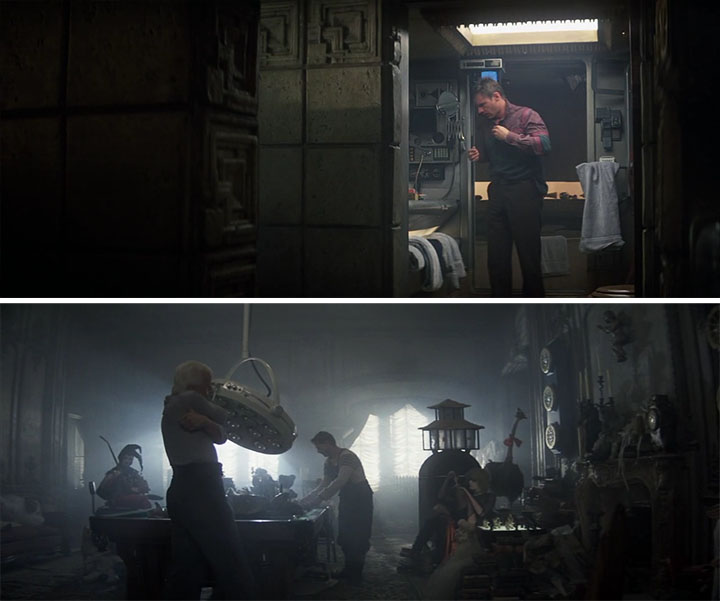
Smoke helps define depth planes through contrast differentiation. Top: Selective lighting and a bit of smoke help lift the midground from the foreground and the background. Bottom: Smoke is also a way to pop silhouettes and visualize light shafts.
Atmospheric conditions are certainly hard to control, but the tonal perspective effect can be mimicked on a smaller scale, and that includes interiors. This is achieved through the use of artificial smoke and fog. Their higher particle density leads to much more pronounced atmospheric effects and faster color modulation with increasing distance. So infusing atmosphere into the set also creates atmospheric perspective. Even a little bit of smoke adds some fill to the shadows in the far end of the set, establishing an axial gradient of contrast. This lowers the contrast of the background and softens it, helping the subject to stand out. Rain can work in a similar fashion as a device for enhancing depth. The water droplets are much bigger particles, but they also obscure objects, scatter light and veil the distance.
You can read the the first part of the Creating Depth series here. And the next part is on light and depth.


Great article. as always.